Wood accents and furniture are a staple in many homes since they add charming or rustic character to any design. Wooden furniture is particularly popular since it’s also incredibly versatile and can be painted, stained, or even distressed to create a whole new look and style.
Since wood is a natural material, though, it can be finicky. Particularly when wood is used in outdoor spaces like patios, it’s exposed to the elements and can eventually warp. Once the damage is done, can warped wood be straightened? We’ll walk you through why wood warps and some methods for how to unwarp wood.

What causes wood to warp?
How do you fix warped wood? The first step in the process is figuring out what caused the problem in the first place. If you try to fix warped wood without fixing the environmental issue that’s causing it, you’ll end up with more warping.
The main causes of warping wood are excessive moisture and excessive heat. When wood is exposed to moisture, even if it’s just in a humid space, the water moves through the cells of the wood. This causes the wood’s fibers to swell up and start expanding. Once the water dries, the fibers shrink back down into a distorted shape. Similarly, when heat is introduced to wood, thermal expansion takes place, creating the same expanding and shrinking motions that cause the shape of the wood to warp.
A flat piece of wood warps into a few different shapes, but there are two that are the most common. Bowing is when the ends of the wood turn upwards and cupping is when the sides of the wood curl upwards.
Before trying to fix your warped wood pieces, make sure you identify and correct the moisture or heat imbalance in the space so that the wood doesn’t continue to warp.

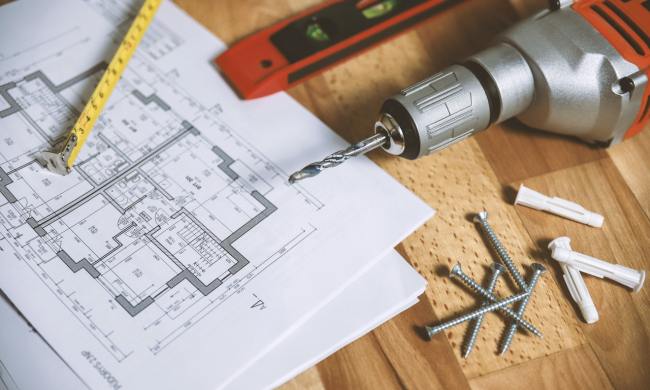
1. How to unwarp wood with an iron
One effective method for unwarping wood is to reintroduce moisture in a controlled way. When the wood gets moist again, especially with hot steam, it becomes malleable and can be reshaped with a bit of effort. This method is particularly useful with a large piece of wood, like a kitchen table, that has become bowed.
Step 1: Grab an iron, along with an ironing board if the wood piece will fit on it.
Step 2: Turn the iron on the highest heat setting.
Step 3: Soak some towels in water and wring them out until they are just damp.
Step 4: Cover the whole surface of the wood that’s warped with wet towels.
Step 5: Proceed with ironing the towels over the warped areas until the wood flattens.
Step 6: Use clamps to keep the wood tight against the flattened surface until it dries completely.

2. How to unwarp wood using sunlight
The sun is a great source of warmth that can be harnessed to heat up your warped wood. This method works well for large wood pieces that have become either cupped or bowed. You’ll still need to introduce moisture to the wood for this method to be effective.
Step 1: Soak towels in water and cover the warped wood surface with them.
Step 2: Place the wood item in an outdoor area that gets a ton of direct sunlight.
Step 3: Make sure the wood piece is placed directly against a hard, flat surface with the cupped area face down.
Step 4: Allow the piece to sit in the warm sun for three or four days. You’ll need to refresh the towels with water periodically so that the wood is kept moist.

3. How to unwarp wood using pressure
Our last method involves using weight or pressure to correct the warped wood. This method also requires some moisture, but in a targeted area so that a specific side of the warped wood straightens out. The pressure method is useful for smaller wood items that can be clamped onto a table or workbench.
Step 1: Use thin sheets or paper towels for this method. Get them wet and apply them only to the concave side of the warped wood.
Step 2: Wrap plastic sheets around the wrapped wood piece to lock in moisture since the process will take several days.
Step 3: Use clamps to secure the wood piece to a flat surface. Tighten the clamps slowly and carefully so that the wood doesn’t crack or split. Alternatively, you can also weigh the warped section down by placing bricks or cinder blocks on top of it.
Step 4: Leave the wood clamped or weighed down for about a week so that the moisture dries up gradually and the wood unwarps slowly without splitting.

4. How to unwarp wood using a heat gun
A heat gun is a handheld tool that blows hot air and is commonly used for tasks like paint removal, thawing pipes, and bending materials, including straightening warped wood. Here's how to straighten wood using a heat gun.
Step 1: Place the warped wood on a flat, heat-resistant surface and use clamps to hold it firmly in place.
Step 2: Lightly mist the wood with water using a spray bottle or damp cloth to prevent burning and improve flexibility.
Step 3: Set the heat gun to medium heat and move it evenly across the warped area, keeping a few inches of distance.
Step 4: While heating, press down with clamps or weights to flatten the wood gradually.
Step 5: Allow the wood to cool completely while clamped to retain its straightened shape.

How to prevent wood from warping
Wood is highly responsive to changes in moisture, so maintaining a consistent indoor humidity level between 40% and 60% is essential. Here are some tips to manage humidity and moisture around your wood furniture and decor.
- Use a hygrometer to monitor humidity and employ a dehumidifier or humidifier as needed to keep it within this range.
- Avoid placing wooden items in direct sunlight or near heating vents, as extreme temperature fluctuations can cause warping.
- Regularly dust and clean your wood furniture to prevent the accumulation of moisture-absorbing dirt and grime.
- Use coasters and placemats to protect wooden surfaces from spills and heat, which can also contribute to warping over time.
By following these steps, you can help ensure the longevity and beauty of your wood furniture and decor.
You love your wood furniture, natural wood surfaces, and other wood accents, so it’s disappointing when they become warped or otherwise damaged. By following the methods in this guide, though, you may not have to replace warped wood just yet and may be able to squeeze some more life out of your charming wood pieces and enjoy them for years to come.