
This is the easiest way to make your own chalk paint

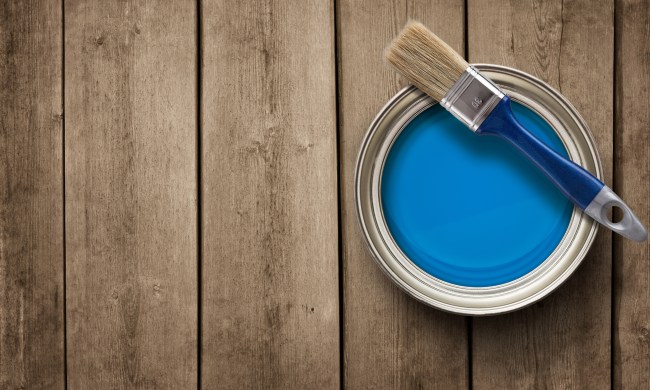
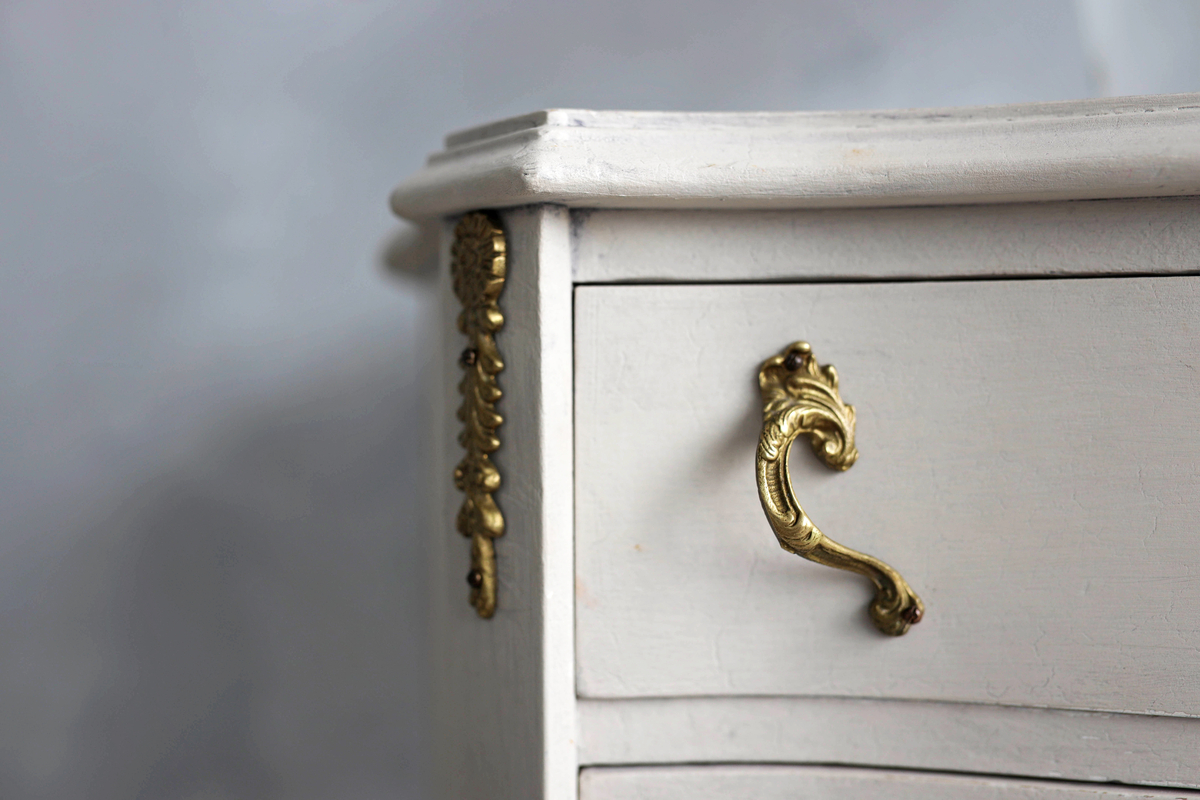
When your wood furniture starts to go out of style or you’re just tired of it, you don’t always need to spend a fortune replacing the pieces. There are a lot of ways to restore old furniture, upcycle dated pieces, or give your wood furniture a stylish distressed look. One method people are raving about is using chalk paint to revitalize wood furniture. While chalk paint is available to purchase at paint stores, we’re going to walk you through making your own with four different methods.

Image used with permission by copyright holder

What’s so great about chalk paint?

If you’re looking to paint a wood furniture piece, you may be considering different types of paints for your project. Chalk paint is a great choice for several reasons:

  • It adheres to many types of surfaces without sanding or prepping.
  • It goes on easily and beautifully.
  • It has a smooth, matte finish.
  • It’s easy to distress for an antique appearance.
Recommended Videos

If you’re going for a distressed look, chalk paint is the best option. One note, however, is that it’s best to add a standard paint finish or wax finish once you’ve completed the painting project, so that the piece is protected from stains.

Why make your own chalk paint instead of buying it?

It certainly takes a lot more time and energy to make your own chalk paint, so you may be wondering what the benefit is of making it on your own. The biggest plus is, as you might expect, making your own chalk paint is far less expensive than buying it from the store. In fact, you can save up to 50% in paint costs when you make it on your own using acrylic or latex paint and some other ingredients.

  • Average cost of chalk paint: $30 per quart
  • Average cost of regular paint: $15 per quart
Image used with permission by copyright holder

How to make chalk paint with acrylic paint or latex paint

We’ve gathered four different recipes for DIY chalk paint, and you can use these methods with either acrylic or latex paint, depending on your preference. While latex paint cleans up easier and gives off less chemical fumes, acrylic paint is more durable and therefore better for pieces that will be in high-impact areas or exposed to the elements.

How to make chalk paint with baking soda

The baking soda DIY chalk paint method is by far the cheapest, but the overall result isn’t as smooth as other methods. It’s a great option if you’re aiming for a distressed farmhouse look. Simply mix the three ingredients and stir the mixture until thoroughly combined before applying it to the wood.

  • 1 cup paint
  • 1/2 cup baking soda
  • 3 tablespoons water

How to make chalk paint with un-sanded grout

Using un-sanded grout is a great method for making chalk paint, since it results in that smooth, matte finish. It’s fairly inexpensive but a bit more costly than the baking soda method. Note that the grout and paint mixture dries fast. This is great news for letting the furniture piece dry after painting, but it also means the mixture gets thick and clumpy quickly.

Mix together the water and grout first, then pour it into the paint to mix before applying. You can add more water to the mixture to smooth it out if the project takes more than 30 minutes or so and the mixture starts to thicken.

  • 1 cup paint
  • 2 tablespoons un-sanded grout
  • 1 tablespoon water

How to make chalk paint with Plaster of Paris

Plaster of Paris is made from calcium sulfate, so when it’s combined with water and left to dry, it hardens quickly to produce a durable coat of plaster. When combined with paint, it creates a gorgeous matte finish that’s durable, and its results are pretty close to that of store-bought chalk paint. It’s a bit more expensive than the baking soda and grout methods but still far more economical than buying chalk paint at the store.

First, mix the plaster of Paris with small amounts of water until a smooth paste forms. Then, add the paste to the paint and apply it to the wood surface.

  • 1 cup paint
  • 1/3 cup plaster of Paris
  • Water

How to make chalk paint with calcium carbonate

While it’s the most expensive method on the list, using calcium carbonate in your DIY chalk paint gives you results that are the closest to, and almost exactly like, store-bought chalk paint. After all, chalk is primarily made from calcium carbonate.

The beautiful matte finish is durable, smooth, and has great coverage. It dries within 30 minutes, and the cost of the project is still far below store-bought chalk paint.

Simply add the calcium carbonate to your paint, and apply it to the wood surface.

  • 1 cup paint
  • 1/2 cup calcium carbonate

Revitalizing wood furniture is a fun project that can really give both the piece and the room a great facelift. While chalk paint is all the rage for its smooth, matte finish, making your own chalk paint requires just a little more effort to save you a bundle of cash. With one of the methods on this list, that old piece of wooden furniture will be given new, stylish life.

Veronica Sparks
Veronica Sparks is a writer from Milwaukee, Wisconsin who loves writing about gardening, home décor, and DIY life. She’s…
7 easy ways to update your home for under $500
Update your home with these inexpensive, easy projects
Couple painting white walls

When most homeowners think of renovations, they think of time-consuming projects that always run over budget. And often, they’re right. But updating your home doesn’t have to cost an arm and a leg. Tearing down cabinets and installing brand-new hardwood floors aren’t the only ways to up your home design game.

With a bit of planning and elbow grease, you can refresh your space with inexpensive home remodeling projects that will have a considerable impact. Here are seven DIY home projects that you can easily complete for less than $500.
1. Give the bathroom a makeover

Read more
Can you paint in high humidity? What you need to know
Make sure your paint job is still gorgeous when conditions aren't ideal
Red roller brush black paint on white wall

Are you planning a painting project but worried about the moisture in the air and how it will impact your paint job? If you're concerned about humidity levels while you paint, you've come to the right place. Since paint needs to dry properly to have a beautiful and smooth-looking result, humidity is certainly an issue. So, is painting in humid weather possible? While the answer to that question is yes, we'll discuss some of the concerns and tips for dealing with humidity and painting indoors or outdoors.
How does humidity affect your paint job?

Moisture in the air means there's moisture on the surface you're about to paint. A damp surface is not ideal for painting, and you may find that your overall result doesn't look as great as you'd hoped. Let's dig into the specifics of how high humidity negatively impacts your paint job.
Moisture could lead to mold growth
When you're dealing with high humidity, surfaces tend to dry slowly. When you're painting indoors, for example, you always want to wash your walls before slapping down a coat of paint, so high humidity could slow down the drying process. If your walls are damp when you start to paint, this could lead to mold growing between the wall and the paint. The mold will eventually grow through the new layer of paint, and you will need to clean the area and paint again.
Paint will struggle to dry
For most paint types to dry, the water in the paint needs to evaporate faster than the solvents. In high humidity, the water struggles to evaporate, making for a gunky, gel-like layer of paint. Eventually, when the humidity level falls, you'll find that this type of consistency will dry with a wavy texture since it has not been set properly. You likely won't be satisfied with the result.
Wood surfaces could swell
As you may know, moisture on wood causes it to swell. If you're painting wood when there's a lot of moisture in the air, the wood could start to swell a bit after you've put on a coat of paint. This swelling could cause cracks or chips in your coat of paint, which will eventually lead to the surface needing to be repainted.
Paint may not adhere to metal surfaces
Painting metal objects can already be difficult since paint doesn't adhere to them as easily as it does to wood or other materials. Humidity can worsen this effect, so if you're trying to paint something metal, it might be best to leave that for a drier day.
What is the ideal humidity level for painting?

Read more
How to paint your kitchen cabinets in 9 simple steps
A simple and low-cost way to refresh your space
Man holding paint rolling after painting kitchen cabinets

Kitchen renovation is one of the most impactful and cost-effective home remodel projects, with returns on investment of about 87 percent. While it’s no wonder that kitchen remodels are popular, but they’re also very expensive — cabinetry alone runs $5,000 to $6,000 on average. If money is tight, or your kitchen only needs a minor update, painting the cabinetry, rather than replacing it, will save you thousands of dollars while giving the room a completely new look. Plus, you can do it yourself in a couple of days.
Tools and supplies you'll need for the job

Rosin paper
Painter’s tape
Plastic sheeting
Screwdriver 
Household cleanser or trisodium phosphate commercial degreaser
Abrasive pad
Liquid deglosser
Wood filler
Putty knife
100-grit sandpaper
220-grit sandpaper 
Tack cloth 
Latex caulk 
Paint scraper
Primer paint
Trim or enamel paint with a durable, high-sheen finish
4- or 6-inch roller, with foam cover
3- or 4-inch square brush
2 ½- or 3-inch angle brush

Read more