Walking around your home during the day, you may not notice all the creaks in the floorboards or the squeaky doors in your house. After all, the sounds of everyday life tend to drown out those small, creaking sounds.
When the house falls silent in the evening, though, that noisy door quickly turns into a downright disturbance. Opening it can possibly waking up the whole family in the middle of the night. If you’re looking for some DIY solutions and guidance to fix a bothersome, creaky door, you’ve come to the right place. We’ll walk you through how to fix a squeaky door with some quick methods and some more involved ones, all of which are effective at silencing that creaking.

Why do doors squeak?
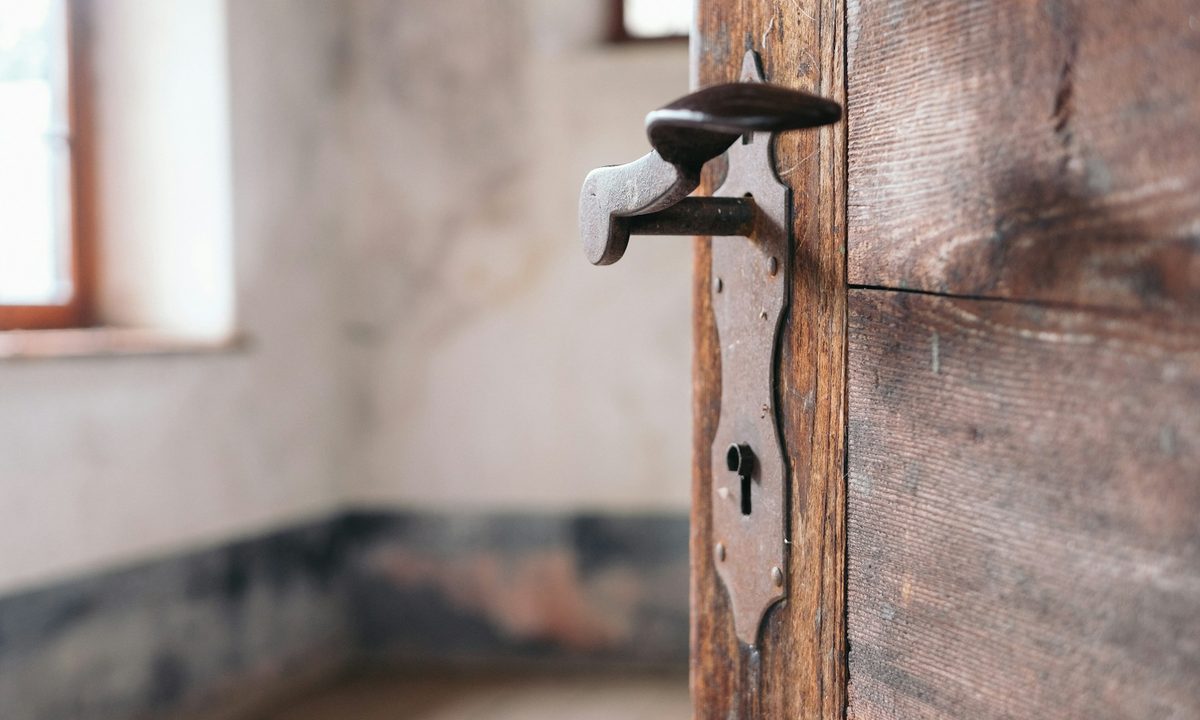
That shrill noise happening when you open or close your door is actually the sound of the metal hinge rubbing against the hinge pin. Your specific door could be squeaking as a result of a couple of different issues.
If your door is brand new and it’s squeaking, it simply doesn’t have enough lubrication to keep the metal from rubbing together. If your door is an older one, however, the hinges are likely dirty. A layer of gunk has accumulated over the years and it’s pushing the metal pieces together further, creating the annoying sound. In this case, simply adding lubricant won’t solve your problem — you'll probably have to take the door apart in order to clean or replace the hinges.

How to tell if you'll need to take your squeaky door apart
If you're dealing with a squeaky door and wondering whether you need to take it apart to address the issue, here are a few steps to help you determine the best course of action:
- Inspect the hinges: Start by examining the hinges of the door. Look for any visible signs of wear, rust, or misalignment. If you notice significant damage or excessive wear, it may be necessary to take the door apart.
- Test the door movement: Open and close the door a few times while paying attention to the squeaking sound. If the noise persists regardless of the door's position, it's more likely that you'll need to disassemble it.
- Lubrication: Before resorting to taking the door apart, try applying a lubricant to the hinges. Use a silicone-based lubricant or a spray lubricant specifically designed for doors and hinges. Apply the lubricant to the top and bottom hinges, allowing it to penetrate the moving parts. Open and close the door several times to distribute the lubricant. In many cases, this simple step can resolve the squeaking issue without disassembly.
- Check for loose screws: Tighten all the screws on the hinges and the door frame. Loose screws can contribute to the squeaking noise, so make sure they are properly secured. Use a screwdriver or a drill with an appropriate bit to tighten any loose screws.
- Evaluate the severity: Consider the severity of the squeaking. If the noise is relatively mild and occasional, it may not be necessary to take the door apart. However, if the squeaking is loud, persistent, and disrupting, it might be worth disassembling the door for a more thorough inspection.

How do you fix a squeaky door without taking it apart?
The quickest and easiest way to address a loud, squeaking door is to lubricate the hinges. This puts a layer of oil between the metal pieces and stops them from scratching together noisily. The most effective product to use for lubrication is WD-40, which works effectively at immediately stopping the noise. It also lasts a long time on your hinges. Here’s how to apply WD-40 to your door hinge.
Step 1: Attach the straw applicator to the nozzle.
Step 2: Point the applicator at each hinge and spray the product directly onto it.
Step 3: Allow the product to sit for several minutes.
Step 4: Take a clean rag and wipe away excess lubricant from the hinges.

Other lubricants to use on creaking doors in a pinch
When it comes to handy DIY solutions to squeaky doors, there are a few easy, cost-effective options. Here are some household products that can be used in a pinch to lubricate your noisy door:
- Olive oil can be applied to the hinges with a cotton ball. Open and close the door a few times to allow the oil to work its way into the crevices.
- Petroleum jelly is among the messier methods, but it can also be applied using a cotton ball or Q-tip.
- Chapstick can be applied directly to the hinge leaves to stop squeaking. Push it in as far as you can and then open and close the door a few times to get the wax around the hinge pin.
- Non-glycerin bar soap can be rubbed directly on each hinge, but it takes a while to get enough soap in there to eliminate the squeaking. Be sure the soap doesn’t contain glycerin, as it can cause rust on metal.
- Candle wax is another messy option since the wax needs to be melted first. Also, you’ll have to pull out the hinge pins and apply the wax directly to them.
- Hairspray is a super fast and easy fix. Simply spray it directly on the hinges. However, this method lasts the shortest amount of time and will need to be repeated frequently.
How to remove a door to clean the hinges
On older doors, the best way to stop that squeak for good is to remove and clean the hinges. This is the most involved method and requires some tools and materials to complete.
Step 1: Mix warm water and dish soap in a bowl.
Step 2: Use a screwdriver to remove the screws holding the hinges to the door.
Step 3: Pull the hinge pins out of the hinges and place all parts into the soapy water.
Step 4: Allow them to soak for about half an hour.
Step 5: Use a toothbrush or steel wool to remove any residual dirt or grime stuck on the hinge and hinge pins. An electric toothbrush makes this job much easier.
Step 6: Rinse all hinge parts thoroughly and dry them with a clean, dry rag.
Step 7: Apply lubricant to all hinge parts and replace them on the door.
Step 8: Open and close the door a few times to move the lubricant around. This will also help you determine if the door still squeaks.

How to prevent doors from becoming squeaky again
To prevent doors from becoming squeaky again, regular maintenance is key. Apply a lubricant like silicone spray or WD-40 to the hinges every few months to keep them well-oiled. Clean the hinges periodically to remove dust and debris that can cause friction.
You can also tighten any loose screws on the hinges to ensure a secure fit. For an added layer of protection, consider using a weather-resistant lubricant if your door is exposed to the elements. Regular care can significantly extend the life of your hinges and keep them squeak-free.
A squeaky door isn’t just annoying, it can also be quite a disturbance in your home. Particularly if you have young children, one noisy door can mean lots of lost sleep. Keep your home peacefully quiet by addressing that squeaky door with one of the methods or products we’ve discussed here, and make sure your sleep remains undisturbed.


