Now that you’ve delayed cleaning your apartment by binge-watching everything your friends have recommended, it’s time to get down to it. The good news is, it’s an apartment, not a house with five bedrooms and four bathrooms; you can do it with a little planning and organizing.
First, get your supplies. Find a good all-purpose cleaner that can do double and even triple duty so you can be more efficient. You need a glass cleaner, furniture polish, your all-purpose cleaner, microfiber towels or good rags that won’t shed lint all over (think old t-shirts), a garbage bag, disinfecting wipes or spray for the bathroom, and at least one thing to get into little corners and crevices, like an old toothbrush.
Here’s your short to-do list
- Put on some motivational music
- Take pictures
- De-clutter
- Start with the kitchen
- Clean the bathroom
- Do the other rooms
- Finish off with the odd places
- Take a seat (we’ll explain)

Take a picture
Take a picture of the room and look at the picture. Usually, the items that are out of place will stand out. Since you live there, you are used to the way it looks. When you take a good look at the photo, you will notice that the stack of magazines in the corner really doesn’t look like a neat stack; it looks more like a stack of magazines you should put away.
De-clutter
Even if you use the blender every other day for a smoothie or a margarita, it needs a place to live when you aren’t using it. Find one. If that means re-arranging the cabinets so you can put it where the pans were or if you can push it next to the cereal, do just that. Less clutter on the kitchen counters makes your kitchen look bigger and cleaner.
Do the same thing with the box of teabags or can of coffee, the box of tissues you use every once and a while on the side table in the bedroom, and the set of coasters on the coffee table you never use.
Do a walk-through with a garbage bag and empty all the garbage cans.
In the kitchen
Wipe down the countertops, clean off the front of the refrigerator and clean the kitchen sink. If the kitchen sink and the refrigerator are stainless steel, make sure to wipe with the grain so as not to scratch their surfaces.
Use a non-abrasive cleaner in the sink if it’s stainless steel. If it’s a composite sink, fill it a quarter of the way with soapy water and wipe down the sides and the divider getting off all the leftover food.
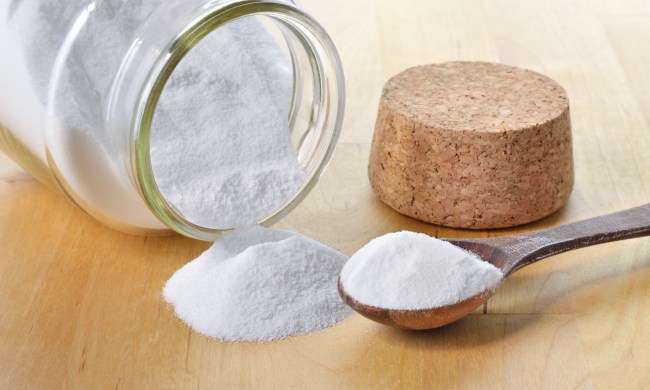
Put a lemon peel or a handful of baking soda down the garbage disposal and run it. Not just on and off, run it long enough to get everything cleaned out. Hum a couple of stanzas of happy birthday, then turn it off.
Now sniff your sink. Does it still smell, well, funky? That plastic or rubber flanged part in the garbage disposal at the top, that’s the splash guard. Take that off and wash around the edges and on the reverse side. That’s where grease and grunge hang out and smell.
Wash the floor if it needs it, clean the oven if it needs it—follow the directions on the oven cleaner carefully.
A word about the stove: If it’s a smooth cooktop that requires a specialized cleaner, be sure to use it.
Use the vacuum cleaner in the kitchen. You can vacuum crumbs off the counters, crumbs out of the crumb tray of the toaster, debris at the bottom of the stove, and those weird pieces of lint and dust that congregate in the kitchen drawers.

The bathroom
Ick. Buck up, you can do it, turn the music up a little louder and wash around the bottom of the toilet first, because that’s the worst part. Now wash out the tub making sure you get the ledge, too. Is there mold on the back of the shower curtain? If there is, wipe it down or check for washing instructions and buy a new one if it’s a hopeless case.
The bathroom, with its nooks and crannies around the toilet bottom, might be where you have to use the toothbrush to give it a good scrub.
Wash the floor and take a page from the professional cleaners’ book and wash the baseboards, too.
For the bathroom and the kitchen, if there is an area that doesn’t come clean with one wipe, spray, walk away, and do something else. Come back after a little while and wipe off the cleaner.
The rest of the house
Dust first and then vacuum. That way, you are vacuuming up the dust you just dusted off.
Take your throw pillows outside and give them a good punch or two to get all the dust off. If you’ve got throws on chairs or the couch, they need to be washed and dried.
 Those odd places
 Those odd places
Clean the ceiling fan and get the cobwebs out of the ceiling corners. If the vacuum’s wand won’t reach, tie an old t-shirt on to the end of the broom and use that. Use a feather duster to dust the blinds, mirrors, artwork, and bookshelves.
Take a seat
Sit on the closed toilet in the bathroom and look around. That’s a different vantage point from standing, and you will see something you might have missed. Sit on a chair in the kitchen and the couch and do the same thing. Finally, sit a little bit longer in the living room and enjoy your nice clean apartment.