An organized pantry makes for organized living. Cleaning out and organizing your pantry will simplify meal prep, reduce the amount of food you throw away (saving you both time and money), and make it easier to find grab-and-go snacks.
The process of organizing all of those boxes, bags, cans, and containers, however, can feel like a massive undertaking. Luckily, it doesn’t have to be. By establishing pantry organization zones, you’ll begin to store food in a logical, practical way that makes mealtime and snack time easier than ever been before. Even better, you can start — and finish — the entire process in a single afternoon!
 Establishing pantry organization zones
 Establishing pantry organization zones
Sorting your pantry into zones makes it easier to find the foods you need when you need them. Plus, updating your grocery list is a cinch since you can clearly see what you need to replenish and which items should be used in the upcoming week.
Pantry zones, at child-friendly heights, will also help kids easily find and reach the healthy snacks you want them to eat, and keep sweet treats and adult-only items out of reach. Making a designated adult snack zone on a higher pantry shelf also makes throwing together an impromptu charcuterie board much easier. Without the stress of rifling through the shelves, you can quickly pull out the appetizers and wine all from the same area.
There is no one-size-fits-all zoning strategy. Instead, consider your lifestyle and determine which categories make the most sense for your kitchen. Below are just a few examples of the ways you can organize your pantry.
Meal type — Organize food according to when the food is typically eaten. For example, group breakfast foods, like pancake mix, syrup, and cereals into one zone. Separate dinner foods, including pasta, canned vegetables, and rice in another zone, and leave dessert mixes or baking supplies in the last area.
Food type — Separate foods by type: canned foods, beans, sauces, snack foods, pasta, spices, etc. It will be so much easier to locate that can of green beans when it’s always going to be in the same area.
Recipe ingredients — Group items based on how they fit into recipes. For example, have an area for all of your baking supplies, a separate zone for Italian food ingredients, Mexican food ingredients, etc. This is perfect for teaching kids how to cook their favorite foods since they can clearly see all of the ingredients necessary for the dish. By organizing your pantry by recipe, you can also easily notice when you’re running low on a staple ingredient for one of your favorite meals.
Food pantry organization ideas
 Food pantry organization ideas
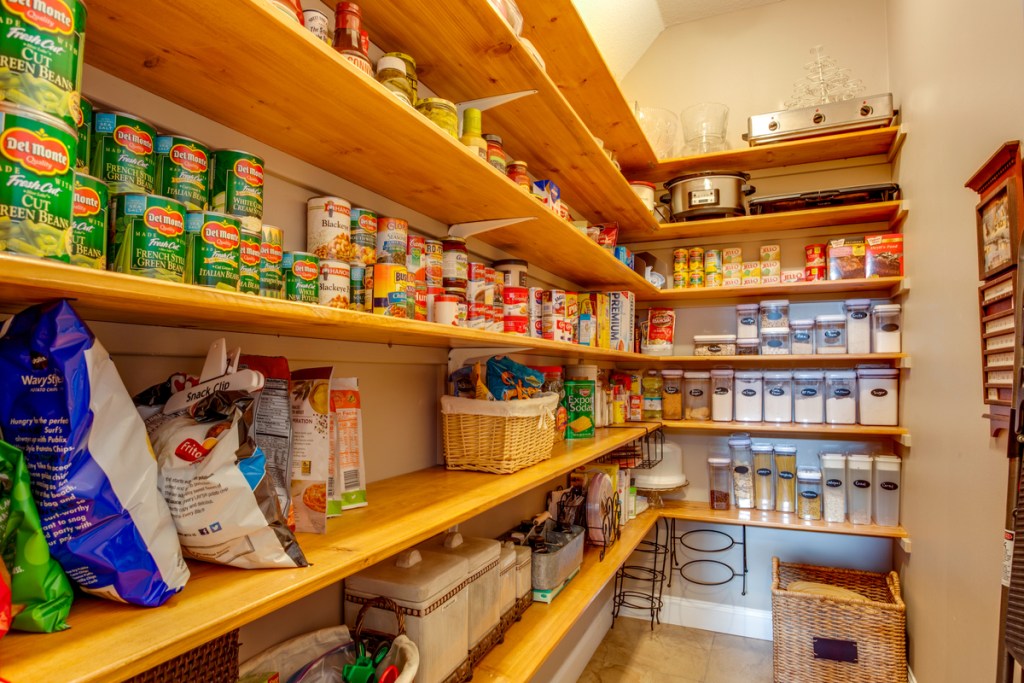
Now that you’ve committed to incorporating zones into your pantry, it’s time to get started. Always begin by emptying out your pantry. Check expiration dates of foods and discard anything past their date. If there are excess nonperishable food items, consider donating these items to a local food pantry.
Once the pantry is empty, clean off all of the shelves so that you are literally starting with a clean slate. Now, the process begins.
- Begin at the top, placing overflow stock, less commonly used items, and adult-only foods on higher shelves.
- Using the organization method you’ve selected (based on meal type, food type, recipe ingredients, etc.), begin delineating the zones. Utilize shelf racks or riser systems to maximize the space within your pantry and ensure that items in the back are clearly visible. For extra clarity, use small appliances, tools, or bookends as a physical barrier between zones.
- When organizing cans, be sure that labels always face out so that you can easily see all the items.
- Rotate the products in your pantry, ensuring that the foods that are set to expire sooner toward the front.
- Create a kid-friendly zone on a lower shelf that’s within easy reach that contains all of their snacks and grab-and-go foods so they can access them without needing an adult’s help.
- Do periodic inventory checks for items that will be expiring soon, and plan meals around those items before the expiration date. This reduces food waste and stretches your grocery shopping dollars.
- Pick up some bag clips to ensure all opened bagged foods are securely closed (including bags within boxes) to maintain freshness as long as possible.
By organizing your pantry into logical food zones, you will spend less time and money when it comes to meal prep and shopping. The kitchen is often the heart of the home, so caring for this space will spread positive energy all throughout the house.