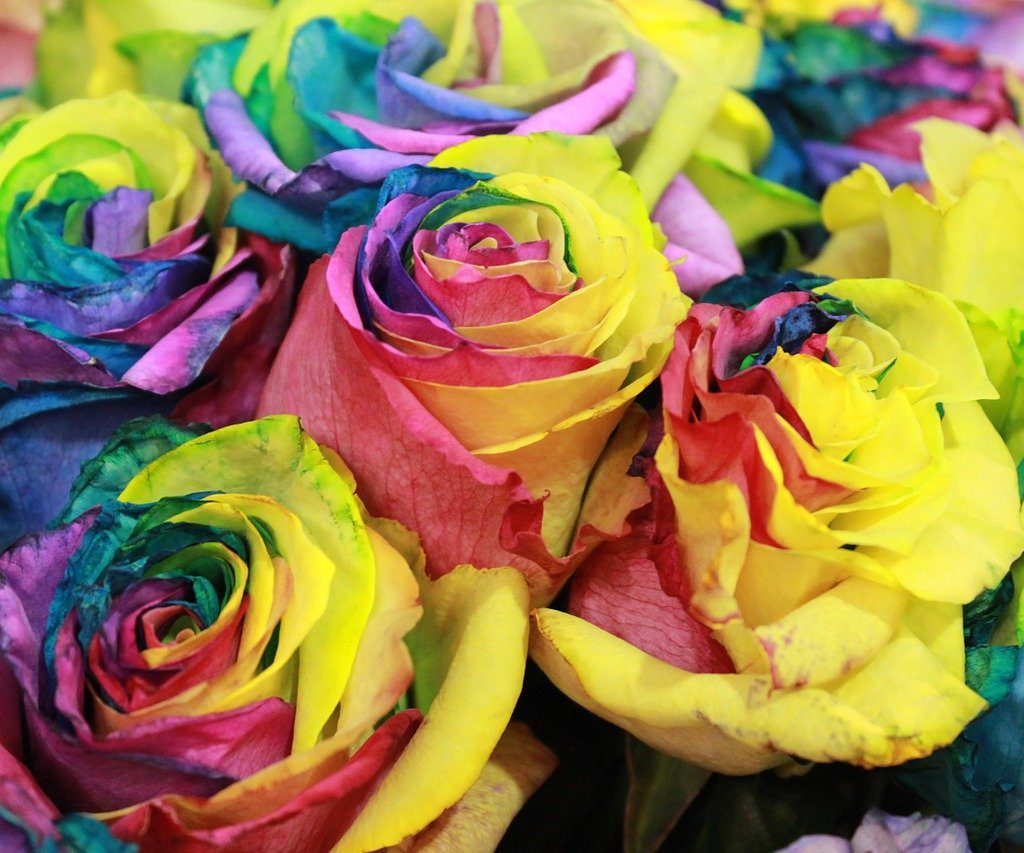
Have you ever seen kaleidoscope roses? If you haven’t, you’re missing out on these magnificent blooms with petals in every color of the rainbow. If you have seen them before, maybe you assumed they were spray-painted at the florist shop, or even that they weren’t real flowers at all—but in both cases, you would be wrong. And, in case you’ve been wondering, the photos you’ve seen have not been photoshopped. These beautiful flowers are real—100 percent real—and much like one of nature’s other miracles, snowflakes, no two are exactly alike.
So if they aren’t spray painted or photo altered, what exactly are they? And can you grow them at home in your own garden? Here’s what we know and how you can be the talk of the block with these stunners:
What are kaleidoscope roses and are they different than regular roses?
The first thing you need to know about kaleidoscope roses is that you cannot grow them from seeds or bulbs, no matter what you may have read elsewhere on the internet. Kaleidoscope, or rainbow roses, are not a result of cross-breeding or genetic engineering. Simply put, they are individually made, not grown. Long story short, you can’t technically grow kaleidoscope roses in your garden.
Creating kaleidoscope roses is actually a pretty simple process, one that has been practiced for centuries. The petals are artificially colored through the flower’s water intake method by splitting the stem into different cups of dyed water. Scientifically speaking, the xylem tubes located in the stem of roses, and other types of vascular flowers, pump color to the leaves and petals if the flower is placed in dyed water. The petals absorb the colored water, and once the water evaporates, the color is left behind. Lighter-colored roses work best since the outer layer of petals is white and pale, and the color transfer is truly breathtaking.
Kaleidoscope roses are unnaturally dyed, which affects the plants’ ability to photosynthesize, which sadly makes them less durable than standard roses. In addition to roses, other cut flowers including, hydrangeas, orchids, and carnations, can be rainbow-hued using the same process. It’s possible to create an entire bouquet made of gorgeous kaleidoscope flowers of various varieties.
If you’ve always wanted to know how to dye roses rainbow colors, we have a step-by-step guide.
Create your own kaleidoscope roses at home in 5 easy steps
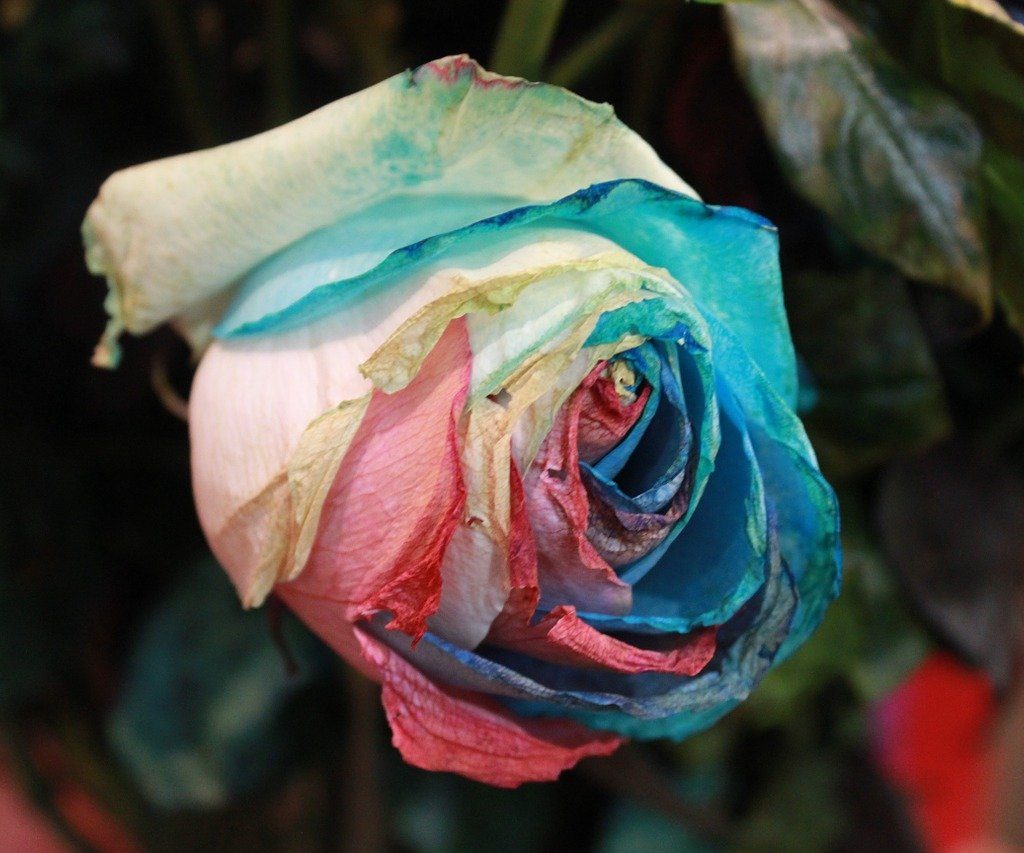
- Rose selection: White roses are the best choice for creating kaleidoscope roses at home. If you cannot find white roses, choose the lightest color rose you can find, like light peach or pale yellow. In addition to the color of the rose you use, it’s also important to note the growth stage the flower is in. Roses at or near the blooming stage will take color most effectively and thus produce the most vibrantly colored roses.
- Stem cutting: Cutting the stem of the rose is a crucial part of the process. Before cutting the stem, it’s important to ensure it’s the correct length to prevent the rose from becoming top heavy and bending during the coloring process. Ideally, the height of the rose stem should be slightly taller than the vase you plan to color the rose in. Hold the roses up to the vase you’re using to get an idea of where to cut the stems before you begin.
- Dividing the stem: Once you’ve trimmed the length of the stem it’s time to cut the stem into sections. Using a sharp blade, divide the stem into multiple sections, mindful not to tear the stem. Divide the stem into up to four equal sections—cutting too many could weaken the stem—noting that the number of sections will determine the number of colors in each kaleidoscope rose. The cuts should extend from the bottom of the rose and continue up to no less than one inch from the base of the petals.
- Adding the color: Using ordinary food coloring, add several drops of color into separate water containers. The number of colors you use should correspond with the number of sections you’ve made in your stem(s). You can regulate how intense you want your result colors to be based on how much food coloring you add to the water. For truly intense color, use special floral dye instead of food coloring. When choosing water containers, select narrow and sturdy styles (like test tubes) and place each stem section into an individual water container. Note: the stems are very delicate and could break easily if you are not careful. You can then place the entire assembly into a vase or larger container so they stand freely.
- Watch the magic: You should begin to notice the color change in as little as 30 minutes. The longer you keep the roses in the colored water, the more vibrant the resulting flower petals will be. It can take days or even up to a week to get truly vibrant colors so set a timer and be patient if you want intense colors.
All roses are beautiful, no matter their color, but roses in every color of the rainbow are truly awe-inspiring and unique. Whether you find them at your local florist or dye rainbow roses at home, kaleidoscope roses certainly make a dramatic statement second to none.


