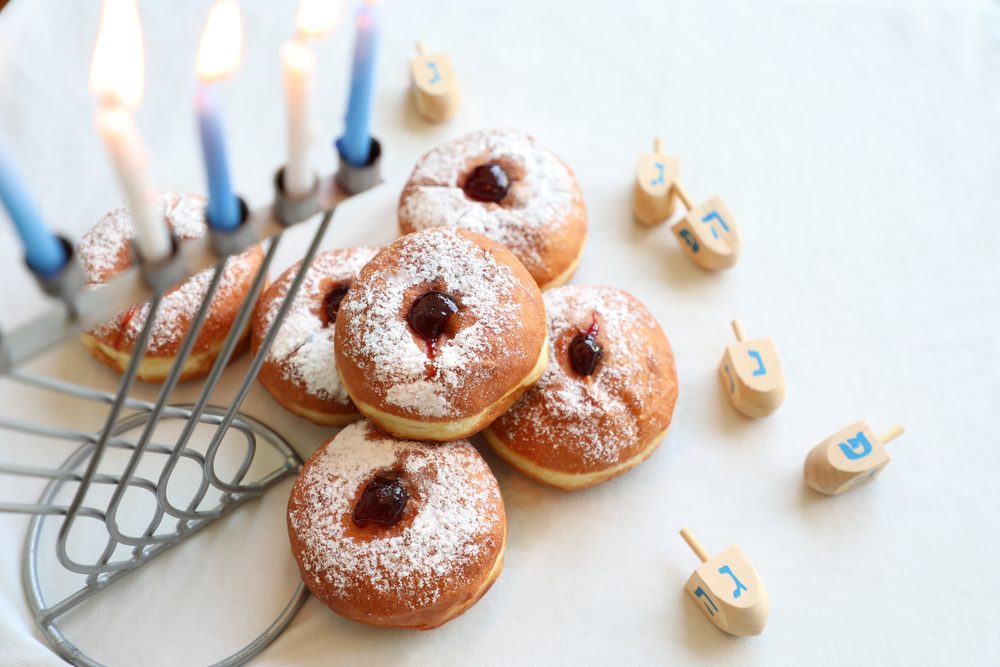
When Hanukkah approaches, our mouths start watering as we get ready to commemorate the holiday with all the most delicious fried foods. While latkes take the prize as one of the most popular and beloved Hanukkah dishes, doughnuts are a fried sweet treat that few can resist. In Israel alone, over 18 million Hanukkah doughnuts are produced and consumed in the weeks around the eight-day holiday. If you’d like to try your hand at some homemade Hanukkah doughnuts this year, we’ve got you covered. We’re going to go over how to make this festive sweet treat like a pro.
What is the significance of Hanukkah doughnuts?
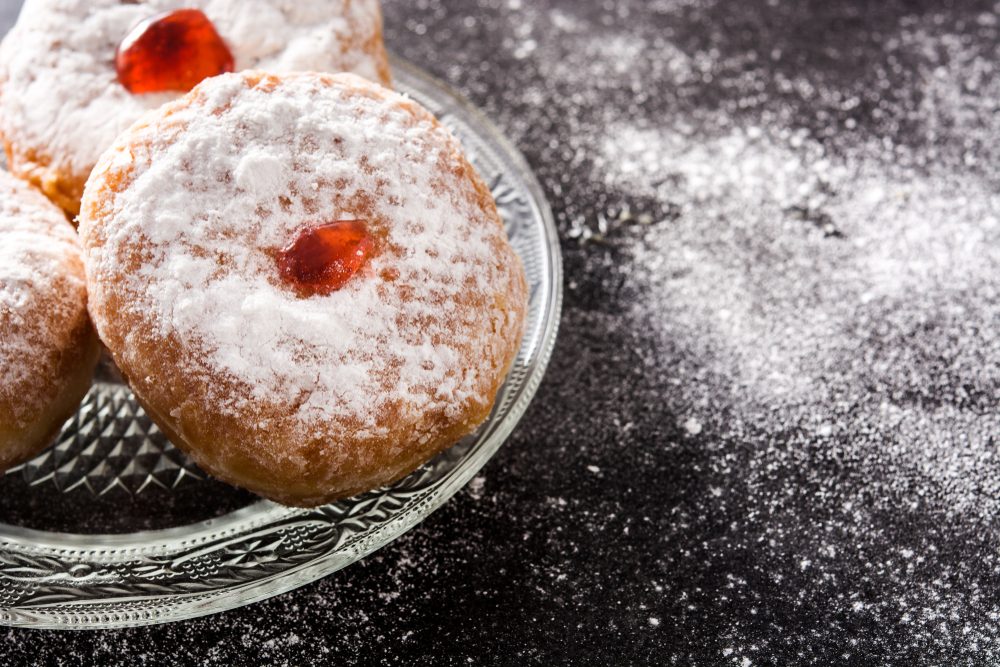
Hanukkah doughnuts, often called Israeli doughnuts or “Sufganiyot,” are a staple treat that is eaten most often during the Jewish holiday Hanukkah. These sweet and divine little bites are traditionally jelly-filled doughnuts that are fried in oil and dusted with powdered sugar.
Hanukkah doughnuts recipe
Tools for the trade
- Stand mixer with kneading hook (or a wooden spoon)
- Mixing bowls, small and large
- Rolling pin
- Large saucepan or frying pan
- Deep frying thermometer
- Straining spoon
- Cookie sheet
- Paper towel
- Wooden skewer
- Pastry bag and piping tip
Ingredients
- 3 cups vegetable oil, and a little more to oil your bowl
- 1 cup jam, any flavor
- 2 tbsp active dry yeast
- 1/2 cup water, warmed to 100 degrees
- 1/4 cup and 1 tsp granulated sugar
- 2 1/2 cups flour, and a little more to use for dusting
- 2 eggs
- 2 tbsp butter, at room temperature
- 1/2 tsp nutmeg, freshly grated
- 2 tsp salt
How to make Hanukkah doughnuts
Making the dough
- In a small mixing bowl, mix together yeast, water, and 1 teaspoon of sugar. Set it aside until it gets foamy, about 10 minutes.
- In a larger mixing bowl or stand mixer, put the flour in and make a hole at the center.
- Drop eggs, 1/4 cup sugar, butter, nutmeg, salt, and yeast mixture into the hole.
- Use the kneading hook attachment on your stand mixer and turn it on the low setting to knead the mixture (or stir the mix by hand with a wooden spoon) until a sticky dough forms.
- Toss some of your extra flour to dust your working surface and place the dough on top of it.
- Knead the dough with your hands for about 8 minutes, adding flour if the dough is still too sticky until it’s soft and bounces back to its shape when you poke it.
- Oil a mixing bowl and place the dough inside.
- Cover the bowl with a clean towel or plastic wrap and place it in a warm place. After about 1-2 hours, the dough will have risen to roughly double its size.
Kneading and cutting the dough
- Dust your working surface again with flour and roll out the dough until it’s about 1/4 of an inch thick.
- Use a drinking glass or a round cookie cutter with a 2 1/2 inch diameter and cut out 20 circles of dough.
- Lay dough circles on a wax paper-covered cookie sheet and cover them with a clean towel or plastic wrap for about 15 minutes to let them rise.
Frying the doughnuts
- Fill a saucepan or frying pan with vegetable oil and heat it over medium heat until it reaches 370 degrees.
- Line a cookie sheet with a paper towel to lay doughnuts on when they come out of the oil.
- Use a mesh straining spoon or metal slotted spoon to slip dough rounds into the oil. Place only four dough rounds at a time in order to fry evenly.
- Fry each batch of dough rounds for about 40 seconds on the first side, then turn them over and fry for another 40 seconds.
- Remove the fried doughnuts and place them on the paper towel-lined cookie sheet.
Adding sugar and jam
- Roll each doughnut in sugar while they’re still hot.
- Repeat the frying process until all doughnuts are fried and rolled in sugar.
- Fit a pastry bag with a piping tip and fill it with your chosen jam.
- Use a wooden skewer to make a hole on each doughnut’s side.
- Insert the piping tip into the hole and pipe in roughly 2 teaspoons of jam into each doughnut.
Making and eating Hanukkah food is a tradition that has been practiced for generations. While many people choose to purchase store-bought Sufganiyot, when it comes to Hanukkah doughnuts, nothing beats homemade. Freshly fried, crispy, and sweet, these doughnuts will be sure to impress the whole family as you celebrate the holiday this year.


